Learn how fun and easy it is to make paper bead bracelets and other jewelry with this step by step DIY tutorial
Making Paper Beads is one of those fun crafts we did when I was a kid. It was one of our go-to projects that was perfect for teenager birthday parties or just a rainy afternoon.
The cool thing about this craft is that you only need basic materials which you probably already have such as old magazines, construction paper, matches, some Tacky glue and sealer, such as Mod Podge.

What are Paper Beads?
Basically, paper beads are exactly what it sounds like. They are beads that are made out of strips of paper. The paper is cut into a template and then rolled around a match.
Once the match is removed, you are left with a hole running through the center of the bead for the string.
The type of paper you use can be anything but for this tutorial, we will be using old magazine pages. Magazines are fun to use for paper beading because the pages are often bright, shiny and colorful.
Oh, and if you are into Gel Printing then you probably have lots of colorful, fun papers to make into beads!
What can you make with paper beads?
These beads are perfect for jewelry such as bracelets, necklaces and earrings. In addition, paper beads can be used to make fun home decor such as vases, baskets, hot pads and garlands.
You can even customize them to the season. For instance, you can make your beads with red, white and green pattern paper to use for Christmas decorations or pink and white for Valentines Day.
At a glance:
First, you cut strips of colorful paper, then you roll them onto a match stick, glue them, seal them and string them to make a necklace or bracelet.
According to Mod Podge: “If you want to make them extra shiny, use Super Gloss Mod Podge or a high gloss spray sealer.”
Materials and Tools
- Old Magazines or Construction Paper
- Tacky Glue
- Mod Podge or Acrylic Spray Sealer
- Pen or Pencil
- Ruler
- Scissors
- Matches
- Jewelry Cording or Yarn
- Darning Needle


Making paper beads step by step:
1. Make a Template
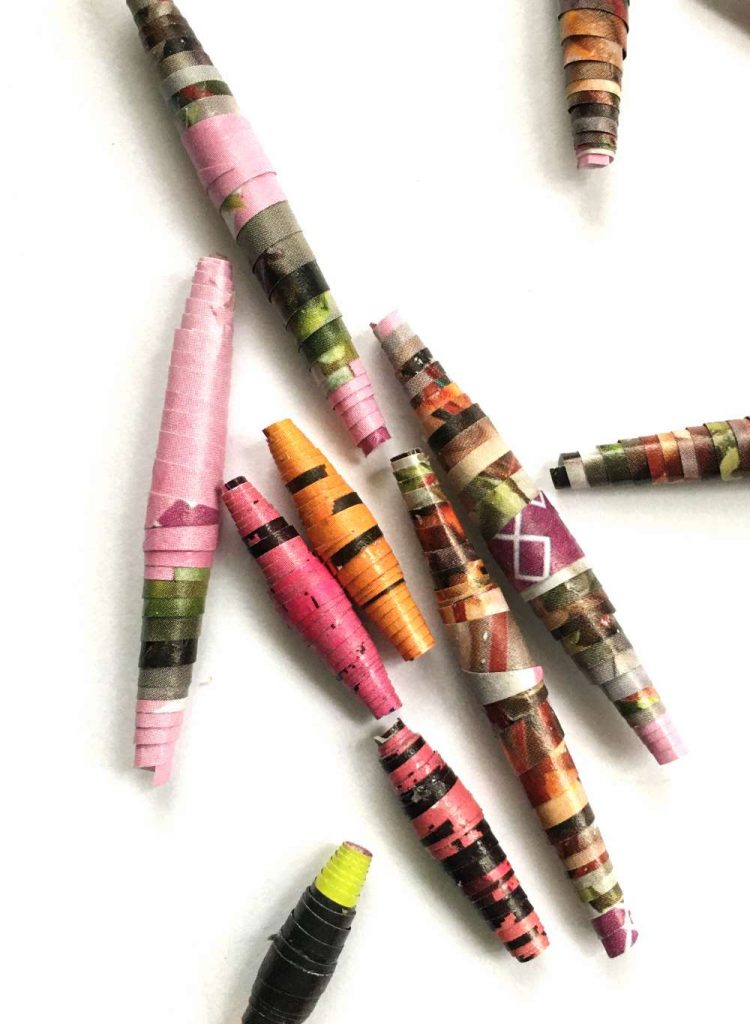
Basically, different shaped templates will give you differently shaped beads. For this particular project, we will make a long bead that is tapered at the ends and has a thicker center. The shape of this template is a long triangle.

2. Cut the paper into strips
First, you need to look through your magazines and choose the pages for your beads. These can be any color or color combination you want.
Keep in mind that the paper will be rolled up, so you will only see one side of each page.
Next, with your pencil and ruler, you will mark your pages as follows (see template above):
All along one edge of your paper, make a mark at every inch. On the opposite edge, make the first mark at 1/2 inch and then every 1″ from then on (i.e. at 1 1/2″, 2 1/2″, 3 1/2″, etc.)
This side marks the center of the bead which will measure half of the length of the whole bead.
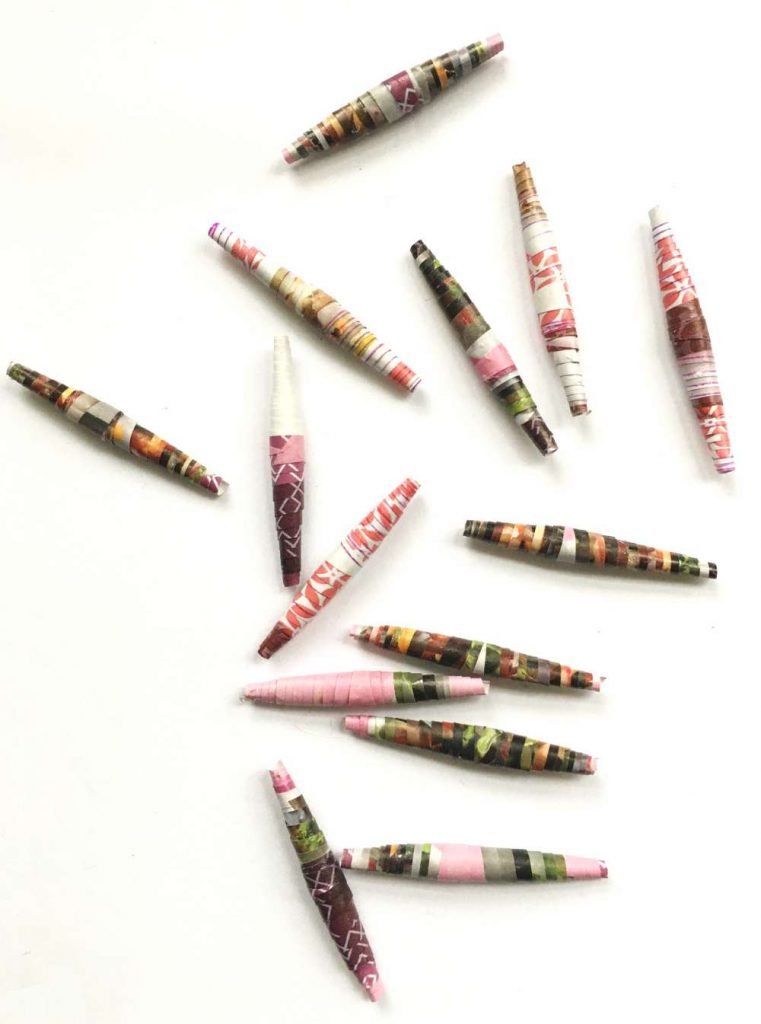
I made two different sizes of beads: 1″ long and 2″ long. So, for the 2 inch sized beads, mark one edge at 2″, 4″, 6″, etc. and the other edge at 3″, 5″, 7″, etc.
Now, using your scissors, go ahead and cut out all of the triangles.


3. Roll up the strips of paper
I had a little trouble getting the glue to come out as I needed it. It was just a bit too thick. So, before you begin rolling your beads, you may want to squeeze out a glob of glue onto a scrap piece of cardboard.
Now, for each paper bead, lay one of the triangles on a table in front of you, pointed end up. Place a match across the bottom edge nearest you, opposite the point.
Holding the paper and the match together, slowly begin rolling the match and thereby wrapping the paper around it. Try to keep this somewhat tight, but remember you will also need to remove the match later.

To help hold the paper, you will want to add a bit of glue every now and then. You can easily do this by dipping one of the matches in the glue and applying it to the paper.
When you get to the end, add more glue to the tip of the triangle to hold the bead together.

Repeat rolling up your strips of paper until you have enough for your project. Hint: if you are making your beads into a necklace, why not go ahead and make a matching paper bead bracelet?

4. Seal the paper beads
Once you have rolled up all of your beads, you can seal them either by painting them with Mod Podge or spraying them with an Acrylic Sealer.
Turn your beads into a bracelet
Once the sealer has dried, take your beads and string them onto the cording or yarn. If you are using yarn, simply thread it on the darning needle and then add the beads. Tie a knot at the end or add a closure.
Hey don’t miss 11 Cute DIY Valentine Card Ideas and Staining Paper with Tea
How do you harden paper beads?
Once you have sealed the beads with your Mod Podge or spray sealer, let them dry completely (a few hours) and then seal them one or two more time.
The more layers of sealer, the harder the beads will become and also the more durable they will be.


As I said above, there are other shapes of paper beads that you can make. The difference is the shape of the template.
This article shows you three different ways that you can make paper beads.
Since you are probably home with your kids right now, give this fun craft a try! And I would love to see your finished projects so make sure and share photos in the comments below.
Enjoy!
Annette
FiberArtsy
How to make Paper Beads for Bracelets and Necklaces

Disclosure: This page contains affiliate links. See Disclosure for details.
Learn how fun and easy it is to make paper beads for colorful jewelry. This step by step tutorial will show you how to make the beads and also how to string the paper beads to make bracelets, necklaces and even earring.
Making paper bead jewelry is a great craft idea for kids and teenager birthday parties.
Materials
- Old Magazines or Construction Paper
- Tacky Glue
- Mod Podge or Acrylic Spray Sealer
- Matches
- Jewelry Cording or Yarn
- Darning Needle
Tools
- Pen or Pencil
- Ruler
- Scissors
Instructions
- Pick some colorful magazine pages and mark where to cut your template as follows: make a mark at every inch. On the opposite edge, make the first mark at 1/2 inch and then every 1″ from then on (i.e. at 1 1/2″, 2 1/2″, 3 1/2″, etc.)

- Cut out the strips of paper for the beads.

- Place one of the triangles on a table in front of you, pointed end up. Lay a match across the bottom edge nearest you, opposite the point and slowly begin rolling the the paper onto the match, adding a bit of glue as you go and at the end.

- Repeat with the remaining papers

- Seal the beads with Mod Podge or Acrylic Spray

- To make a bracelet or necklace, simply thread the yarn or cording on the darning needle and then add the beads. Tie a knot at the end or add a closure.


Recommended Products
As an Amazon Associate and member of other affiliate programs, I earn from qualifying purchases.


Related Craft Ideas


