Learn the Art of Nuno Felting with wool and silk in this complete step by step tutorial
Welcome to Part 3 of my Wet Felting Techniques Series. This tutorial will show you how to felt raw wool, roving or fiber into an open weave fabric such as silk chiffon or silk gauze to create a unique, lightweight scarf, wrap or shawl.
Nuno felting is such a fun fiber art method that allows you to turn heavy sheep’s wool or alpaca fiber into a one-of-a-kind, totally unique fiber masterpiece.
While regular felting methods result in a heavier fabric, the Nuno technique lends itself particularly well to thin and airy wraps or shawls.

What is Nuno Felting?
It is a wet felting technique developed by fiber artist Polly Stirling where raw or processed wool or other animal fiber is embedded or entangled into an open weave fabric such as silk chiffon or silk gauze.
The felting is accomplished by applying water, heat and friction to the wool.
Note: You do not have to use silk for this to work. Any open weave fabric that is fine. Keep in mind, the heavier the base fabric, the heavier your final piece will be.
Materials and Tools
- Wool Roving
- Silk Chiffon or Silk Gauze *
- Silk Roving or Sliver for Decoration (optional)
- Matchstick Blind or Bubble Wrap **
- Water
- Olive Oil Soap or Dish Detergent ***
- Sprayer Bottle
- Plastic Table Cover
- Nylon Hose or Scrap Yarn
- Old Towels
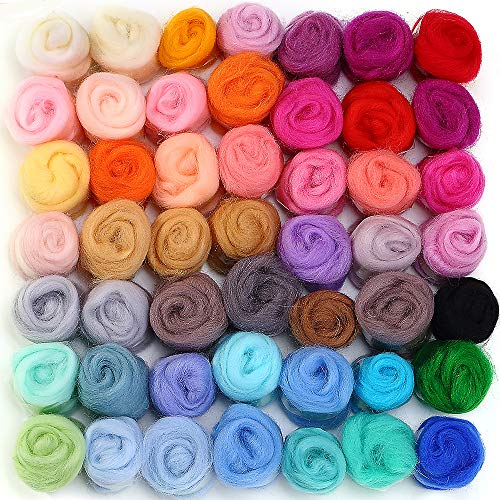
- HIGH QUALITY MATERIALS – Our wool roving is made of soft fiber wool, this is needle felting…
- RICH COLORS – Each package comes with 50 pretty and brilliant rainbow colors, fluffy and soft,…
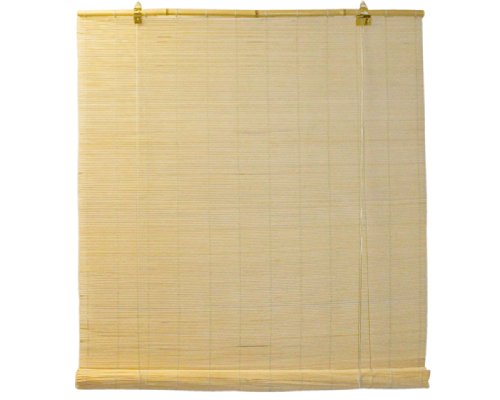
- Natural wood-tone bamboo matchstick roll up blind without valance
Notes on supplies:
If you are a new feltmaker or you don not plan on making a lot of felted pieces, there is no need to spend a ton of money on special supplies.
The two main items you need are the wool and the fabric. Everything else is optional or can be found for little or no money.
What kind of silk is used in nuno felting?
As I said above, you do not have to use silk, any non-synthetic fabric will work as long as the weave is open, allowing the fibers to migrate through.
If you do use silk, make sure that you buy 100% Silk such as this Chiffon and not a synthetic fabric. While a polyester may work, it would be much more difficult and frustrating for a beginning felter.
Matchstick Blind or Bubble Wrap **
If you are a beginner, go ahead and use the bubble wrap. It is cheap and easy to find at any box store or you can get it here.
If, however, you plan on doing a lot of felting or you want to make larger pieces, you really should get a Matchstick Blind. They are inexpensive and durable. Just make sure your blind is all natural wood or bamboo and has not been stained or dyed.
Note: be aware that bubble wrap is slippery and may be harder to control than a blind.
Olive Oil Soap or Dish Detergent ***
Many fiber artists swear that Olive Oil Soap is best for felting. I’ll be honest, I have not tried it myself.
Personally, I have always used plain dish detergent such as Ivory Liquid Soap. Just make sure that your detergent is clear or white in color so it won’t stain your wool.
I have used orange colored soap which discolored my white wool.
What kind of wool do I need?
Really the only rule is that the wool you use must be a protein fiber. That simply means means animal fiber.
Animal wool (just like human hair) is not smooth. Rather, each fiber has notches along the sides of the hair shaft which open up and tangle with other fibers, allowing it to felt.
Synthetic wool such as acrylic, nylon or polyester is machine made and completely smooth along the shaft.
Note: it is possible to use this type of wool for dry or needle felting
How much wool do I need?
How much wool obviously depends on how large and elaborate your nuno piece will be. This is a large piece of silk (approximately 8 feet x 28 inches) but I only felted a few swirls designs instead of the entire piece. For this project, I used about 2 ounces.
If you plan to cover your entire piece of chiffon, you will obviously need more wool.
Note: wool shrinks by about 20% during the felting process
Since this is a large project, I will use the bamboo Matchstick Blind for rolling. If you don’t have one, no worries, bubble wrap works just fine.
It just tends to be a bit fussier since the plastic slips and slides. Make sure and secure it well with some nylon strips.


Step by step instructions:
Wet felting can be a messy project. (It is for me, anyway!) So, before you begin, you will want to cover your table with the plastic. We will be using a lot of water so you may also need to cover the floor as well.
Now, spread out your blind on the table and lay the silk chiffon on top, smoothing out any wrinkles. If you are using bubble wrap, lay it bubble side down.
Choose a design
Next you need to decide on a design for your piece. Do you want it completely covered with wool? Do you like geometric shapes? Swirls, circles, stripes all work well.
Note: if the edges of your fabric are raw and not hemmed, you may want to cover them with wool on both sides
There is no right or wrong here so try not to overthink it. I know you want it to be perfect but just have fun with it.
Draft the wool
As a general rule, it is much easier to felt thin layers than thick ones because it is more difficult to get water and also agitation inside a thick piece of wool.
Really thick bunches may not felt at all. So, you want to begin by drafting or thinning out your roving.
To do this, take a length of roving and firmly hold it with one hand. With your other hand, take a hold of the roving about 12″ away and gently pull to thin it out.
This takes a bit of practice to get it even. If it breaks, no problem, you can use small pieces, too. If it is too difficult to pull apart, try holding your hands further apart.
Place wool on fabric
Now you will lay your thinned out wool pieces on top of the fabric creating whatever design you want. (I prefer curves to straight lines so I made swirls but you can do whatever you like.)
Overlap the edges of your separate pieces to ensure that you do not end up with gap.
Add the silk sliver decoration
If you are using the silk roving or sliver, you will repeat the drafting process. Thin out the silk and lay it on top of your wool.
This is completely optional but silk roving or sliver gives a nice sheen and luster to the finished nuno felt fabric.
Note, pure silk sliver will not felt by itself so you must lay it on top of the wool.


Wet and work the wool
Now the fun starts! First, fill your spray bottle with hot water and add a few squirts of soap. Begin by thoroughly spraying your wool with the soapy water.
Place your hands flat on the wool and carefully start working the water into the fiber. Small movements are all you need at first. Press down a bit to make contact between the silk and the wool.
Add more water, if needed. You want the fiber to be completely saturated with water. Remember, dry fiber won’t felt!
Just keep working the wool all across your shawl, making sure the entire piece is thoroughly wet.
Next, place a piece of bubble wrap or other plastic on top of the roving. With the flats of your hands, begin working the wool a little more firmly. Add more water as needed. Keep working the fiber all across your piece.


Roll the piece
If you are using a matchstick blind: place a plastic sheet on top of your piece, making sure it is completely covered. Then, beginning at one end, tightly roll up the blind. Finally, secure the roll in 2 or 3 places with the scrap yarn or nylon hose.
If you’re using the bubble wrap: place a second layer of bubble wrap on top of your shawl and roll it up from one end. Tie in 2 or 3 places with the scrap yarn or nylon hose.
Now place your hands on the blind or bubble wrap and begin rolling back and forth, all the way from your fingertips to your elbows, gradually increasing pressure. Continue rolling your felt for a good 15 minutes or so.

Test the felting process
Now we need to see how the quickly the wool is felting. For some reason, some projects take longer than others.
To do this, unroll the package and do what we call a ‘pinch test’. (I forgot to take a pic of the pinch test so here’s an old one.)
With your thumb and forefinger, pinch a bit of fiber and gently it pull up. Is it holding together? If yes, move on to the next step.
If it is not, you need to roll the whole thing up again and continue rolling it back and forth for another 5 minutes or so. Again, do a pinch test and either move on or repeat the rolling step.

Fulling
The final step in wet felting is the fulling or throwing stage. This will ‘full’ your fiber, meaning it will shrink, harden and complete the felting process.
Note: Don’t start throwing your felt until your piece has passed the pinch test. Make sure all of the fiber is holding on to the fabric.
Pick up your shawl GENTLY, wad it up and let it fall on the table. No force here, just gently let it drop. Pick it up and drop it again.
Keep dropping your fabric about 50 to 100 times. After a while, you will begin to notice the fabric firming up and at this point you can start to increase the pressure.
Check your piece every now and then by carefully laying it out and tugging on it. Continue throwing your scarf until it starts to wrinkle and pucker.
At this point, your shawl is finished. If you want your nuno scarf to have more wrinkles, you can continue to throw it. Just make sure to check it every minute or so. It is very easy to over felt and end up with a hard piece of fabric.

Finish the shawl
The only thing that is left now is to thoroughly rinse out all of the soap with room temperature water. Try not to handle your shawl too much as it will continue to felt and harden.
Once the water runs clear, place it in a bowl of water or bucket with about 1/2 cup of white vinegar and soak it for about 15 minutes. This will neutralize any soap residue that may degrade your fibers over time.
Finally, just smooth out your shawl and then hang it up to dry.

Now you know how to felt wool with the Nuno Felting technique. It is not much different than the basic wet felting technique other than using a mesh fabric as a base.
If any of these steps are unclear, please let me know. And if you try this tutorial, please send me a photo of your creation!
Enjoy,
Annette
How do I wash my Nuno felted scarf?
You will want to hand wash your felt very gently using a hand wash laundry soap. DO NOT place it in the washing machine or it will continue to felt and you will end up with a ball of wool.
How to Felt Wool - Nuno Felting Method
Materials
- Wool Roving
- Silk Chiffon or Silk Gauze
- Silk Roving or Sliver for Decoration (optional)
- Water
- Olive Oil Soap or Dish Detergent
- Spray Bottle
- Plastic Table Cover
- Nylon Hose or Scrap Yarn
- Old Towels
Tools
- Matchstick Blind or Bubble Wrap
- Sturdy Table
Instructions
- Gather your supplies

- Draft the Roving - Lay the silk flat on the table. Then, draft or thin out the wool by gently pulling it between your hands. Place it on the silk.
- Add the Silk, if using. This is completely optional.
- Wet the wool with soapy, warm water. Cover it with bubble wrap and work the water into the wool and silk with your hands for several minutes. Add more water, if needed and con
- Roll the piece up with bubble wrap or a matchstick blind and roll it back and forth for at least 15 minutes or more. Check the felting process with the 'pinch test'

- Fulling the nuno felt: After your felt passes the pinch test, pick up your piece and gently let it drop on the table. Repeat dropping until the felt has firmed up.
- Thoroughly rinse and hang to dry

Recommended Products
As an Amazon Associate and member of other affiliate programs, I earn from qualifying purchases.
-
 SILK MERINO Fiber for Spinning. Super Soft Combed Top Wool Roving for Hand Spinning, Wet Felting, Nuno Felting
 -
1 Lb. Merino Wool Roving Yarn - Fiber Roving Wool Top, 100% Natural Undyed Soft Spinning Wool Roving
-
100% Pure Silk Chiffon Fabric by The Yard, 48 Colors
-
Tussah Silk Sliver Luxury Natural Unbleached Honey Color 50g
-
Natural Bamboo Matchstick Roll Up Window Blind 24-Inch Wide by 72-Inch Length (Light Brown)
-
Duck Brand Bubble Wrap Roll
-
Olive Oil Bar Soap - 100% Natural Pure & Artisan Hand Crafted Quality (Single Bar)


Related Wool Felting Tutorials:
- Wet Felting Basics for Beginners
- Cobweb Felting a Scarf
- Lattice Felting
- Resist Felting a Bowl
- DIY Felt Dryer Balls
- How to Needle Felt (for Beginners)
- What is Felting? A Beginner’s Guide
- DIY Wool Dryer Balls with Needle Felt Designs


