Learn how to Felt Wool with the Cobweb Wet Felting Technique
Welcome back to my Wet Wool Felting Series where I show you different techniques to produce a variety of felted fabrics. This article shows you how to felt wool with the Cobweb method which makes a lightweight felted fabric, perfect for a shawl or summer wrap.

What is Cobweb Felting?
Just like the name suggests, Cobweb Felting creates a felted fabric with a ‘cobwebby’ texture. Meaning, that instead of a thick sheet of felted wool, a cobweb felted scarf is light and airy with thin areas and even holes.
This wet felting technique lends itself especially well to summer evening shawls or wraps where a thick wool coverup may be too warm.
Felting Supplies:
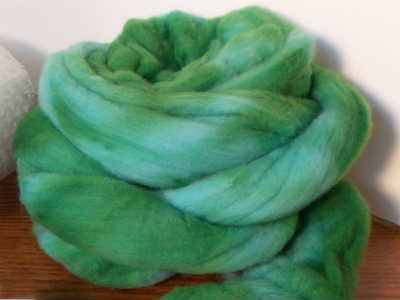
- Wool Roving
- Matchstick Blind or Bubble Wrap
- Hot Water
- Olive Oil Soap or mild Dish Detergent
- Spray Bottle
- Piece of flat plastic or bubble wrap
- Plastic Table Cloth
- Scrap yarn, string or nylon hose


Notes on my Felting Supplies:
There is no need to spend a lot of money on fancy supplies, especially if you are new to wet felting or if you are just experimenting. Bubble wrap works fine for small projects and can be reused a few times.
If, however, you plan on felting larger or numerous pieces, I highly recommend you get a matchstick blind.
They make felting a bit easier and quicker plus they last a long time. (Make sure and purchase a natural colored blind, not painted or stained)

Prepare the Wool Roving
Before you begin, make sure and cover your table (and maybe floor) with plastic. Felting uses a lot of water! Next, place either your matchstick blind or one sheet of bubble wrap on the table.
To prepare your roving, first you need to draft it or thin it. To do this, pick up a piece of roving and with both hands, gently pull it apart. The fibers need to stay attached to each other but you want thin areas and gaps.
Take your time with this and try not to leave large holes. Small ones are fine and add to the texture. Continue drafting or thinning your wool until the roving is about 25% longer than you want your scarf to be.
The width you want should also be about 25% wider than your final scarf to allow for shrinkage.


If you want your scarf to have fringe at the ends, go ahead and separate the fiber into strands now. If you don’t want fringe, simply move on to the next step.

Wet The Roving
Now, the actual felting begins! Fill your spray bottle with hot water and add a few squirts of soap. Next, you will want to very generously sprinkle or spray water onto the wool.
To begin working the water into the wool, place a piece of bubble wrap or plastic on top of the roving. Then, rub the flats of your hands all over the plastic.
Add more water as needed. You want the fiber to be completely saturated with water. Dry fiber won’t felt!

If you are doing fringe, also wet the strands and work them with your hands. If the strands get tangled together, go ahead and separate the strands, as needed.

Roll the Felt Scarf
Here comes the workout! If you’re using a matchstick blind, begin at one end and tightly roll up your scarf. If you’re using bubble wrap, place a second strip on top of your scarf and roll it up from one end.
Tie up your roll with the scrap yarn or hose in 2 or 3 places. Now, lay your hands on the blind (bubble wrap) and begin rolling it back and forth, all the way from your fingertips to your elbows, gradually increasing pressure.
Roll about 250-300 times. Yes, you read that right! If you’re using bubble wrap, you may need to roll 400 times.

Check out my other tutorials on how to felt wool including:
If you are new to the world of wet or needle felting, you may want to start with my What is Felting – a Complete Beginner’s Guide and Needle Felting for Beginners.

Test the Felting Process (Pinch Test)
After rolling for a while, you will need to check the felting process. To do this, unroll the package and and check the felting progress by doing what is called a pinch test.
Just like it sounds, with your thumb and forefinger, pinch a bit of fiber and gently pull up. Is it holding together? If yes, move on to the next step. If no, continue rolling.

Felt the Fringe
Do you want your fringe to stay flat or would you prefer it rolled? If flat, move on to the next phase. I wanted mine rolled so I took each piece of fringe and rolled it back and forth between my hands – just like you used to do with Playdoh!


Fulling the Felted Scarf
If you read my other tutorials for how to felt wool, you know what’s next….throwing! This will full your fiber, meaning it will shrink and complete the felting process.
Remember, at this point, your scarf is still very soft so handle it GENTLY! You don’t want to stretch out the holes too much.
So, very very carefully, pick up your scarf, wad it up and let it fall on the table. No force here, just gently let it drop. Pick it up and drop it again. Do this about 50 times.
Now, carefully lay it out and pull apart any areas that are not supposed to be sticking together. You’ll know it when you see it.
Continue throwing your scarf until it’s holding together well when you pull on the fiber. It will give, but shouldn’t come apart. You will also notice that your fiber has shrunk and puckered.


Finish the Cobweb Felt
Rinse out all of the soap and hang your new scarf up to dry! Voila! You just made your first Cobweb Felted Scarf!
If any of these steps are unclear, please let me know. And if you try this tutorial, please send me a photo of your creation!
Now that you know how to felt wool with the Cobweb Felting method, make sure and check out my other wet felting techniques: Basic Felting, Nuno Felting and Lattice Felting
How to Needle Felt (for Beginners)
What is Felting? A Beginner’s Guide
DIY Wool Dryer Balls with Needle Felt Designs


